768x90 Getting Online Shouldn't be Tough- $7.49 .com Domains at Go Daddy

Video Streaming in Ruby on Rails

Dream your application like youtube? First of all, this application is only working in UNIX Machine, and has not been tested to Windows. This article is taken from written of johndahl.

First, install the gem:

sudo gem install rvideo
.

Next, install ffmpeg and (possibly) other related libraries. This is documented elsewhere on the web, and can be a headache. If you are on a Mac, the Macports build is reasonably good (though not perfect). Install with:

sudo port install ffmpeg
.

Or, for a better build (recommended), add additional video- and audio-related libraries, like this:

sudo port install ffmpeg +lame +libogg +vorbis +faac +faad +xvid +x264 +a52
.

Most package management systems include a build of ffmpeg, but many include a poor build. So you may need to compile from scratch.

If you want to create Flash Video files, also install flvtool2:

sudo gem install flvtool2
.

Once ffmpeg and RVideo are installed, you’re set.

You should remember the basic commands of RVIDEO and here they are :

file = RVideo::Inspector.new(:file => "#{FILE_PATH}/filename.mp4")
file.video_codec # => mpeg4
file.audio_codec # => aac
file.resolution # => 320x240


command = "ffmpeg -i $input_file -vcodec xvid -s $resolution$ $output_file$"
options = {
:input_file => "#{FILE_PATH}/filename.mp4",
:output_file => "#{FILE_PATH}/processed_file.mp4",
:resolution => "640x480"
}

transcoder = RVideo::Transcoder.new

transcoder.execute(command, options)

transcoder.processed.video_codec # => xvid


------------------------------------------------------
DEMONSTRATION OR EXAMPLE OF USAGE
------------------------------------------------------

  • First Create file by uploading the video to your "#{APP_ROOT}/files/file_name.video_ext", you can use act_as_attachment to do it. Example your file is input.mp4.
  • Then in your controller you can run file inspector object like script below:
file = RVideo::Inspector.new(:file => "#{APP_ROOT}/files/input.mp4")

file = RVideo::Inspector.new(:raw_response => @existing_response)

file = RVideo::Inspector.new(:file => "#{APP_ROOT}/files/input.mp4", :ffmpeg_binary => "#{APP_ROOT}/bin/ffmpeg")

file.fps # => "29.97"
file.duration # => "00:05:23.4"

  • To transcode video, you should initialize a trancoder object :
transcoder = RVideo::Transcoder.new
.
  • Then pass a command and valid options to the execute method.
recipe = "ffmpeg -i $input_file$ -ar 22050 -ab 64 -f flv -r 29.97 -s"
recipe += " $resolution$ -y $output_file$"
recipe += "\nflvtool2 -U $output_file$"
begin
transcoder.execute(recipe, {:input_file => "/path/to/input.mp4",
:output_file => "/path/to/output.flv", :resolution => "640x360"})
rescue TranscoderError => e
puts "Unable to transcode file: #{e.class} - #{e.message}"
end

  • If the job succeeds, you can access the metadata of the input and output files with:
transcoder.original # RVideo::Inspector object
transcoder.processed # RVideo::Inspector object
  • Or you can use another Template for you View:
<% if video.processing_status == 2 %>
<div id="videoplayer<%= video.id %>">
<p>This item requires Macromedia Flash Player 7.</p>
<p>To get the latest version please <a href="http://www.adobe.com/shockwave/download/download.cgi?P1_Prod_Version=ShockwaveFlash" target="_blank">click here</a>.</p>
</div>
<script type="text/javascript">
var so = new SWFObject("/flash/vidplayer.swf?filePath=<%= url_for_file_column(video, 'file') %>.flv&thumbPath=<%= url_for_file_column(video, "file")%>.jpg", "vidplayer", "336", "326", "7", "");
so.addParam("menu", "false");
so.write("videoplayer<%= video.id %>");
</script>
<strong><%= video.title.titleize %></strong><br />
<%= video.body %><br/>
<%= link_to image_tag("icon_video.gif"), url_for_file_column(video, "file") %>
<%= link_to "download original", url_for_file_column(video, "file") %>
<% else %>
<strong><%= video.title.titleize %></strong><br />
<%= video.body %><br/>
<%= link_to image_tag("icon_video.gif"), url_for_file_column(video, "file") %>
<%= link_to "download original", url_for_file_column(video, "file") %>
<p>This video is still being converted, or else there has been some kind of error.</p>
<% end %>

  • Make it simple and never think as frustration then you will success.

That's all explanation about RVideo. You can use RMovie here.

Need a demo script?

Send SMS using Ruby by Integrating Clickatell

--------------------------
Summary
--------------------------
clickatell gem is served to you for sending sms from your ruby application or shell console. This way is only work in linux, BSD and OSX. To use this gem, you will need sign up for an account at the Clickatell website. Once you are registered and logged into your account centre, you should add an HTTP API connection to your account. This will give you your API_ID.


--------------------------
Proof of Concept
--------------------------

  • install gem : {$} gem install clickatell
  • import or checkout the clickatell trunk repositroy
svn co svn://lukeredpath.co.uk/var/svn/opensource/clickatell/trunk clickatell-trunk
OR

git clone git://github.com/lukeredpath/clickatell.git
  • You can now use the library directly. You will need your API_ID as well as your account username and password.
require 'rubygems'
require 'clickatell'

api = Clickatell::API.authenticate('your_api_id', 'your_username', 'your_password')
api.send_message('6285212345678', 'Hello from clickatell & teapoci')
  • Full documentation for the API is available in the RDocs. For debugging purposes, the API allows you to view gateway URIs as they are requested, printed to $stdout. You can enable this by turning on debug_mode.
Clickatell::API.debug_mode = true
.
  • The Clickatell gem also comes with a command-line utility that will allow you to send an SMS directly from the command-line.
  • You will need to create a YAML configuration file in your home directory, in a file called .clickatell that resembles the following:
# ~/.clickatell
api_key: your_api_id
username: your_username
password: your_password
  • You can then use the sms utility to send a message to a single recipient:
{$} sms 6285212345678 'Hello from clickatell & teapoci'
.
  • You can also specify a custom Sender ID – the name or number that will appear in the “From” label on the recipients phone. You can either add a “from” key to your .clickatell file or manually using the—from option:
{$} sms --from 'Luke Redpath' 447771234567 'Hello from clickatell'


For more information : http://clickatell.rubyforge.org/

Auto Complete Typing in Text Field [Ruby on Rails]


Before

After


-------------------------
Summary
-------------------------

Auto complete is used to find suitable words automatically with corresponding data you wanted while you type it into your text field (check images above). It's so easy to implement it.


-------------------------
Proof of Concept
-------------------------


Requirement : products_controller.rb (default scaffold script), product.rb (ActiveRecord), categories_controller.rb (for auto searching script), auto_complete plugin and index.js in folder views/categories/

  • Install plugin : ruby script/plugin install http://svn.rubyonrails.org/rails/plugins/auto_complete/
  • Modify your product.rb
class Product < ActiveRecord
belongs_to :category

def category_name
category.name if category
end

def category_name=(name)
self.category = Category.find_or_create_by_name(name) unless name.blank?
end

end

  • Create or Modify your categories_controller.rb at def index
def index

@categories = Category.find(:all, :conditions => ['name LIKE ?', "%#{params[:search]}%"])

end

  • Create a new file & add script below in views/categories/index.js.erb or index.rjs.
<%= auto_complete_result @categories, :name %>

  • Open your view which is containing form field for your production controller. Then add text_field_with_auto_complete to your wanted text_field, example :
<%= f.label :category_name %>
<%= text_field_with_auto_complete :product, :category_name, { :size => 15 }, {:url => formatted_categories_path(:js), :method => :get, :with =>" 'search=' + element.value" } %>

#if you get error for
formatted_categories_path
#go to your route.rb then add : map.resources :categories

#if get error on
text_field_with_auto_complete
#
go to your route.rb then add :
#map.resources :products, :collection => {:auto_complete_for_product_category_name => :get }

  • Don't forget to put script below into your layout example application.html.erb/rhtml or production.html.erb/rhtml
<%= javascript_include_tag :defaults %>


Please post me message if you have error. Good Luck.


implementation of http://railscasts.com/episodes/102

Create USA States List For Your Ruby on Rails

This way is very simple and fast to make us states list for your view or drop down menu.


Simple right? Enjoy and good luck

Create Country List for Your Ruby on Rails Quickly

There's many sites that provide you country list in sql file, so you can import it to your database. I would like to introduce you ruby way to create country list for your drop down menu. Let's we start :


  • gem install tzinfo
  • ruby script/plugin install tzinfo_timezone
  • Add the code below to your Application_helper.rb
def make_attributes(hsh)

unless hsh.nil?
output = ""

hsh.each
do key, val
output << "
#{key}=\"#{val}\""
end
end
output
end


def country_code_select(object, method, priority_countries=nil, options={},
html_options={})


countries =
[TZInfo::Country.all.collect{xx.name},
TZInfo::Country.all_codes].transpose.sort

if
priority_countries.nil?
output = select(object, method, countries, options,
html_options)

else
output = "< id="'#{object}_#{method}'"
name="'#{object}[#{method}]'#{make_attributes">\n"


if
options[:include_blank] == true
output <<
""
end


priority_countries.each do pc
if options[:selected] ==
pc[:code] or options[:selected] == pc[:name]
output <<
"#{pc[:name]}\n"
else
output <<
"#{pc[:name]}\n"
end
end

output <<
"----------------------------\n"

output <<
options_for_select(countries, options[:selected])

output <<
"< / select >\n"
end
output

end


  • Add this code to your view :
<%= country_code_select(:order, :ship_to_country,
priority_countries=[{:code=>'US',:name=>'United
States'}],{:selected=>'DK',:include_blank=>true},{:style=>'border:10px
solid red;'}) %>

Good Luck

.

Types of Render in Rails

There's many render types that we can use for our view. Rails Render is a strong method that helps you to render your web pages. It comes with many flavors including:

  • Render Action : render an action in the current controller, you can specify if you want layout printed or not.

render :action => "show_home_page", :layout=> false

.

  • Render partial: it renders part of your web page.

render :partial => "left_menu"

.

  • Render template: render a page, the file path is relative to your application.

render :template=> "templates"

.

  • Render file: absolute path is needed

render :file => "#{RAILS_ROOT}/public/file.html"

.

  • Render text

render :text => "You can put any text here"

.

  • Render Json

render :json => {:name => "Teapoci"}.to_json

.


I hope the information above can be useful for you. Thank You.


.

HTML Editor or Rich Text Editor for Your Ruby on Rails Apps

1 . Nice Edit

  • Create your text area in your form_tag range

<%= text_field "demo", "tea_poci", "id"=>"myArea2", :rows=>10, :cols=>22%>

.
  • Create additional button for option of using text editor or not.
<%= submit_tag "Add Editor",:type => 'button', "onclick"=>"addArea2();" %>
<%= submit_tag "Remove Editor",:type => 'button',
"onclick"=>"removeArea2();" %>
  • Put this code under submit_tag "Remove Editor" :
<script type="text/javascript" src="http://js.nicedit.com/nicEdit-latest.js">


</script>

<script type="text/javascript">


//<![CDATA[

var area1, area2;

function addArea2() { area2 = new nicEditor({fullPanel : true}).panelInstance('myArea2');}

function removeArea2() { area2.removeInstance('myArea2'); }


bkLib.onDomLoaded(function() { toggleArea1(); });


//]]>


</script>

  • Done !! You can see image below :


2. Textile Editor

  • [~] gem install RedCloth
  • [~] ruby script/plugin install svn://errtheblog.com/svn/plugins/acts_as_textiled
  • [~] script/plugin install http://svn.webtest.wvu.edu/repos/rails/plugins/textile_editor_helper/
  • [~] rake textile_editor_helper:installGo to yor Model / Active Record that is corresponding to your text_area and put :
class MyModel < ActiveRecord
acts_as_textiled :my_text

end

  • Enable your prototype.js.
<%= javascript_include_tag 'prototype' %>
.

  • Here's a short code for your rhtml or html.erb :

<%= textile_editor 'item', 'my_text' -%>
<%= textile_editor_initialize -%>


3. widgEditor

  • Extract the files
  • Copy the widgEditor.js file into your applications public/javascripts folder (you can configure it by changing this file)
  • Copy the widgEditor.css file into your applications public/stylesheets folder.
  • Copy all the images from the widgEditor distribution to your public/images folder.
  • Include the javascript and css files in your layout file.
  • Give any text field you want to be an editor field a class of “widgEditor”.
  • Here's a short code for your view :
<'HEAD'>
<'/HEAD'>
<% form_tag :action => 'what ever' do %>
< %= stylesheet_link_tag 'widgEditor' %>
< %= javascript_include_tag 'widgEditor' %>
< %= text_area 'node', 'content', :cols => "50", :rows=>"3", :class=>"widgEditor" %>
<% end %>
<% end_form_tag %>

List of Websites of Useful Ruby on Rails Tutorials

  1. AJAX powered chat in 3 hours on Ruby on Rails : Tutorial on creating simple Web chatroom
  2. Ajax on Rails : at ONLamp
  3. Beginner’s Guide to Rails, part 1 : series of tutorials at GodBit
  4. Building Ruby, Rails, LightTPD, and MySQL on Tiger : at Hivelogic
  5. Create a To Do List with Ruby on Rails - Beginner’s Tutorial : at thehua
  6. Distributing Rails Applications - A Tutorial : by Erik Veenstra
  7. Fast-track your Web apps with Ruby on Rails : at IBM
  8. Four Days on Rails : Tutorial in PDF at HomeLinux
  9. Getting Your Feet Wet With Ruby on Rails : at Webmonkey
  10. Installing Ruby on Rails with Lighttpd and MySQL on Fedora Core 4 : at DigitalMediaMinute
  11. Instant Rails : preconfigured Rails software
  12. Introduction to Ruby : for Perl programmers at SixBit
  13. Introduction to Ruby for Mac OS X : at IO
  14. Learning Ruby : by Daniel Carrera
  15. Many to Many Tutorial for Rails (PDF) : at JRHicks
  16. ObjectiveView Ruby on Rails Introduction (PDF) : at Ratio
  17. Really Getting Started in Rails : at Slash7
  18. Rolling with Ruby on Rails (Part1) : at ONLamp
  19. Rolling with Ruby on Rails, Part 2 : at ONLamp
  20. Ruby on Rails : at RegDeveloper.co.uk
  21. Ruby on Rails on Oracle: A Simple Tutorial : at Oracle
  22. Ruby on Rails Screencasts : at RubyOnRails
  23. Try Ruby : Try Ruby in the browser at Hobix
  24. Tutorial : a basic tutorial at RubyOnRails
  25. Really Getting Started in Rails : Despite being written back all the way back in January 2005, Amy Hoy’s short and sweet intro still manages to be relevant
  26. Rails for Designers : by Kevin Clark
  27. Ruby QuickRef : quick reference guide.
  28. Ruby Tutorials : at Tutorialized.com
  29. Using Ruby on Rails for Dev on Mac OSX : at Apple
  30. How to Build a Ruby on Rails Engine: In-depth Start-to-Finish Tutorial : at AlterLabs

thanks to : webdeveloper.econsultant.com

Top 29 Websites for Ruby on Rails Demos

  1. Ajax Scaffold : Generates a production ready, fully styled, interface for managing models
  2. AJAX Live Data Grid Example : Data sub-forms at Unspace.ca
  3. CalendarGrid : build output like a calendar at RubyForge.org
  4. CalendarHelper : methods are intended to make the use of the DHTML/JavaScript calendar as easy as possible ; at RubyOnRails
  5. Collaboa : a collaborative tool for developers using Subversion
  6. DynamicCalendarHelper : calendar with CSS ; by Jeremy Voorhis
  7. Eribium : a Rails CMS
  8. Hieraki2 : wiki engine / CMS
  9. HowToUseDragAndDropSorting : How to use drag and drop Sorting ; at RubyOnRails
  10. Instant Rails : Instant Rails is a one-stop Rails runtime solution containing Ruby, Rails, Apache, and MySQL, all pre-configured and ready to run.
  11. Integrate FCKEditor with your Ruby on Rails application : rich text editor integration ; by Joshua M Charles
  12. Integrating a Rich-text Widget with Struts : rich-text replacement for the textarea ; at OReillyNet
  13. Instiki : wiki clone ; at Instiki.org
  14. LiveTree : JavaScript/DHTML tree widget that loads data asynchronously ; at RubyOnRails
  15. Locomotive : simple tool to help you develop Ruby on Rails applications on Mac OS X
  16. LoginGenerator : add authentication, users, and logins to your rails app ; at RubyOnRails
  17. Movtable : sort table
  18. Open Source Ruby On Rails Shopping Cart : e-commerce platform at SubImage
  19. PaginationHelper : aids the process of paging large collections of Active Record objects ; at RubyOnRails
  20. Progress Bars with GD2 and Ruby : progress bars ; at Husney
  21. rmagick : file/image uploading ; at BigBold
  22. RubyInstaller : This is a “one-click”, self-contained Windows installer that contains the Ruby language itself, dozens of popular extensions and packages, a syntax-highlighting editor and execution environment ; at RubyForge
  23. Simple Ticket : trouble ticket system written using Ruby
  24. SortHelper 1 : SortHelper will create links for your users to sort tables.
  25. SortHelper3 : Helper to sort tables or result sets using clickable column headers.
  26. Substruct : The first and only Ruby on Rails open source e-commerce project.
  27. TinyFile : basic file uploads in a rails app
  28. Typo : Ruby blogging software.
  29. WebDAV Ruby On Rails Plugin : create Ruby On Rails controllers which will respond to WebDAV requests

Thanks to : webdeveloper.econsultant.com

List of request params

@request.env["name_of_params_object"]
.


source : http://wiki.rubyonrails.org/rails/pages/variablesinrequestenv

.

Pictures of VIP or Business Class from Any Airlines

click image to enlarge


Compare your face to celebirty face

Hey Guys,

This web is very fun and really can let your stress turn off. This site can compare your face to celebrity face and get your ancestor trough genealogy method.

To compare your face to celebrity, you can go here :
http://www.myheritage.com/FP/Company/tryFaceRecognition.php

Step 1:
click picture to enlarge

Step 2 :
click picture to enlarge


I dont want my handsome face like him

Create Photo Gallery less than 10 MINUTES

There's many ways to create photo gallery, i want share my experience with very instant photo gallery. Begginer or advance can do it, it's easy. I am using windows OS, Ruby ruby 1.8.5. Let's Start your ruby

  • Step 1 : Download Rmagick(2.3.0) & imageMagick(6.4.0) in 1 Package Here (Download Package).
if you use linux, install imageMagick Library (sudo apt-get install libmagick9-dev) and then install rmagick (sudo gem install rmagick), after that skip step 2.
  • Step 2 : extract package to /ruby/your_app/tmp, make sure that rmagick-2.x.x.tar.gz and rmagick-2.x.x-x86-mswin32.gem are in that tmp folder. After that run it:
gem install rmagick --local
.
  • Step 3 : Install attachment_fu plugin
ruby script/plugin install http://svn.techno-weenie.net/projects/plugins/attachment_fu/
  • Step 4 : Generating the Scaffolding Code
ruby script/generate scaffold_resource Gallery
.
  • Step 5 : Create Gallery Table for DataBase or Gallery Migration, open your db/migrate/001_create_galleries.rb, then insert it :
class CreateGalleries < Migration
t.column :filename, :string, :limit => 255
t.column :path, :string, :limit => 255
t.column :parent_id, :integer
t.column :thumbnail, :string, :limit => 255
t.column :size, :integer
t.column :width, :integer
t.column :height, :integer
end
end

def self.down
drop_table :galleries
end
end
  • Step 6 : After that run this command : rake db:migrate
  • Step 7 : Set up your picture size, open app/models/gallery.rb
class Gallery < ActiveRecord

has_attachment :storage => :file_system,
:resize_to => '>550x>413',
:thumbnails => { :thumb => '>100x>75'},
:size => 0.megabyte..3.megabytes,
:content_type => :image,
:processor => 'Rmagick'
validates_as_attachment


end

  • Step 8 :Edit your controller gallery_controller.rb
def index

@gallery_pages = Paginator.new(self, Gallery.find(:all).count, 5, params[:page])
@photos = Gallery.find(:all, :order => 'created_at DESC', :limit => @gallery_pages.items_per_page, :offset => @gallery_pages.current.offset)

respond_to do |format|
format.html # index.rhtml
format.xml { render :xml => @gallery.to_xml }
end
end


def create

@gallery = Gallery.new(params[:gallery])
@galleries = Gallery.find(:all)

respond_to do |format|

if @galleries << @gallery flash[:notice] = 'Gallery was successfully created.' format.html { redirect_to(@gallery) } format.xml { render :xml => @gallery, :status => :created, :location => @gallery }
else
format.html { render :action => "new" }
format.xml { render :xml => @gallery.errors, :status => :unprocessable_entity }
end
end
end
  • Step 9 :Edit your uploading form to your new.rhtml
<%= error_messages_for :photo %>
<% form_for(@gallery,
:html => { :multipart => true }) do |f| %>

select a photo to upload

title:
<%= f.text_field 'title' %>

Description:
<%= f.text_area 'body', :rows => 6, :cols => 40 %>

Photo:
<%= f.file_field 'uploaded_data' %>

<%= submit_tag 'Upload Photo' %> or <%= link_to 'Cancel', galleries_path %>
<% end %>

  • Step 10 : Activate your server and run your application.

If you got error or problem please give me feedback. Enjoy and good luck.


.

undefined method `require_gem' for main:Object

My Error was it :

F:\ruby\pacochin>rake db:migrate
F:/ruby/bin/rake.bat:24: undefined method `require_gem' for main:Object (NoMetho
dError)

My Solution is:
F:\ruby\pacochin>gem install --remote rake
.

And the error was kicked. Good Luck


.

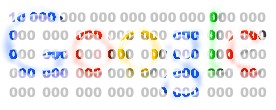
Rejected Google Holiday Logos

Supposed to be celebrating: Children’s Day 2003.
Reason for rejection: Too childish.

Supposed to be celebrating: 150 Years of Cigarettes.
Reason for rejection: Too politically incorrect.

Supposed to be celebrating: 50th Anniversary of Product Placement.
Reason for rejection: Starbucks didn’t pay enough.

Supposed to be celebrating: 5 Years of Google motto “Don’t be evil.”
Reason for rejection: Too self-obsessed.

Supposed to be celebrating: 130th Birthday of Mondrian.
Reason for rejection: Too abstract.

Supposed to be celebrating: 90th Anniversary of the Copyright Act.
Reason for rejection: Potential trademark infringement for using the © symbol.

Supposed to be celebrating: 20th Anniversary of the Nintendo Entertainment System.
Reason for rejection: Severe complaints by the Pet Duck Association.

Supposed to be celebrating: The 65th Birthday of Googol, a 1 with 100 zeroes.
Reason for rejection: Too geeky.

Supposed to be celebrating: This was one of two drafts to honor M.C. Escher.
Reason for rejection: Too creepy.

Supposed to be celebrating: Two decades of the JPEG image compression algorithm.
Reason for rejection: Compression too lossy.


.

Access the blocked site freely

I really dont understand what happen in my government brain nowdays, Indonesia is not Religion Country, but why because of a movie, many important site are blocked by government request, examples are Youtube.com, Rapidshare.com and many things. Even I read on Okezone.com and Detik.com, the government will block all blog sites. It's damn jerk. My government never think that if they block many digital audio visual services online, they will freeze many e-learning sites that use youtube.com for their support media. And it freezes creativities of netters that already have been appreciating their idea to blog sites.

You know what my works are reduced to 40%, because youtube is really helping me by their tutorial online, and watch my favourite USA broadcast. I was hopeless in minutes, but my brain gave me idea. These are other ways to access blocked sites.

1. USING PUTTY for TELNET
It will change your IP address to Singapore Address, I got this tutorial from palzum.blogsome.com. You can follow steps below:

  • Download putty for windows & linux here (save it to c:\windows for WIN_OS)
  • Modify your browser Network/Connection Setting trough this way :
[ For Mozzila/Flock/FireFox]
-------------------------------

click Tools --> Options --> Advanced --> NetWork Settings, then do setting like screenshot below :


[FOR INTERNET EXPLORER]
--------------------------------
1. click Tools - Internet Options - Connections - Lan Settings
2. Marked 'Proxy Server' and click 'Advance' button
3. Set it like the following screenshot


  • [windows] Click Start Menu => Run and enter putty -P 222 -N -D 9999 -C net@cepat.abangadek.com
  • [linux] open your terminal then type it. ssh -o "CompressionLevel=9" -C -D 9999 -p 22 -N net@cepat.abangadek.com
  • Enter password : cepat123, then minimize your putty (never close your putty!!)
  • Open your browser and see there that now you can access back the blocked sites.

2. USING ANONYMOUS BROWSER
  • open google and type browse anonymously free, you will get many online services that offer browsing anonymouse. Example we take http://surfatworkfree.info/
  • and enter the blocked site address to a provided box or field of url then press 'browse' button.
DONE!!! I hope it will be useful for you guys. Good Luck

.

Action Mailer with Gmail or Another Email Account

[1] you can import svn http://svn.nanorails.com/plugins/action_mailer_tls/ to your /vendor/plugins/

[2] edit your environment.rb by adding the last line this code:

require "smtp_tls"

ActionMailer::Base.raise_delivery_errors = false
ActionMailer::Base.delivery_method = :smtp
ActionMailer::Base.server_settings = {
:address => "smtp.gmail.com",
:port => 587,
:domain => 'gmail.com',
:user_name => "convert.ruby.to@gmail.com",
:password => "rubyisred",
:authentication => :plain
}

[3] 100% works

Have nice try and success

Paginate Array Objects in Ruby

def paginate_collection(collection, options = {})

default_options = {:per_page => 10, :page => 1}
options = default_options.merge options

pages = Paginator.new self, collection.size, options[:per_page], options[:page]
first = pages.current.offset
last = [first + options[:per_page], collection.size].min
slice = collection[first...last]
return [pages, slice]
end


Shorted way:

@pages, @users = paginate_collection User.find_custom_query, :page => @params[:page]

I am not the author of this code :)

Have nice try and good luck

 
powered by Blogger